macOS Setup Guide
December 15, 2022
This writing covers some installations and envrironments that are important to set up even if you don’t use them at all because they play a pivotal role some command-line tools. I have been using a macbook Pro for a while, since macOS Sierra up untill macOS monterey. Personally, I would not be upgrading to any further OS installations from Apple as I feel Ventura essentially doesn’t let one differentiate between an iPhone and a macbook, interface wise. But again, I would like to reiterate that it is personal perference for not upgrading to the latest OS.
After a long usage of your mac over months, especially after extensive use of Docker and working with containers, you will find that your mac is running out of space. This is because Docker stores all the images and containers in a hidden folder in your home directory, which is not visible in Finder and quite frankly it is not a good idea to delete them manually. Therefore, every 5 to 6 months, I would recommend you to format your mac and reinstall macOS. This will give you a fresh start and will also free up major space on your mac.

It is a good idea to have a fresh installation of macOS on your Mac. There are two ways of going about it:
• You can do this by booting into recovery mode and reinstalling macOS. This will remove all the files and applications from your Mac and will give you a fresh start.
• You can also do this by formatting your Mac and then installing macOS from a bootable USB. You can find the instructions for this here.
Installing Homebrew
Homebrew calls itself the missing package manager for macOS and is an essential tool for any developer. To use Homebrew, ensure that you have installed the Command Line Tools for Xcode. These tools, which include compilers and other necessary components for building from source. You can also install them directly from the terminal using the following command:
xcode-select --install
And then install Homebrew using the following command:
/bin/bash -c "$(curl -fsSL https://raw.githubusercontent.com/Homebrew/install/HEAD/install.sh)"
After installing Homebrew, you can run the following command to check if everything is working fine:
brew doctor
You can use Homebrew to install a variety of software, including command-line tools like Git and languages like Node.js. To see what you can install with Homebrew, you can run the following command:
brew install <formula>
And to update Homebrew itself, you can run the following command:
brew update
brew upgrade <formula>
To get rid of older versions of formulas installed on your system, in case you want to roll back to an older version. You can do some cleanup to get rid of those old versions by:
brew cleanup
To uninstall a formula, you can run the following command:
brew uninstall <formula>
Homebrew Cask
Homebrew Cask extends Homebrew and brings its elegance, simplicity, and speed to the installation and management of GUI macOS applications such as Visual Studio Code and Google Chrome. This is done by providing a friendly CLI workflow for the administration of macOS applications distributed as binaries such that you need not drag and drop those .dmg files to your Applications folder.
To know if an application is available on Cask, one must refer to the Official Cask Formulae page.
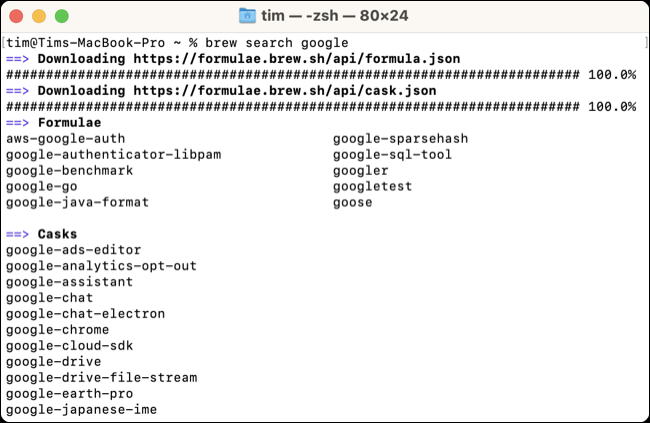
One can also search for an application using brew. To search an application, you can run the following command:
brew search <application>
iTerm2
iTerm2 is a replacement for Terminal and the successor to iTerm. It works on Macs with macOS 10.14 or newer. iTerm2 brings the terminal into the modern age with features you never knew you always wanted. It has some powerful features that make it the perfect choice for developers.
You can see the features from here but some of the features that I like are: Search, Autocomplete, 24-Bit Color, Configurability and many more. You can use Homebrew to install iTerm2 using the following command:
brew install --cask iterm2
iTerm2 Customizations
Here are some of the customizations that I have done to my iTerm2, they are optional and you can skip them if you want.
• Go to iTerm preferences -> profiles -> Default -> Terminal -> Check silence bell or not, depending on how you like it.
• Download one of iTerm2 color schemes and then set it to your default profile by navigating to profile -> colors -> color presets -> import.
• Change the cursor text and cursor color according to your theme to make it more visible. I personally use the inbuilt theme of Tango Dark with their default colors.
• You can also change the font of your terminal to make it more readable. I personally use Monaco with ligatures enabled. You can download fonts using Homebrew using the following command:
brew tap homebrew/cask-fonts && brew install --cask font-<font-name>
• You can also change the transparency of your terminal to make it more appealing.
Tree Command
Tree is a recursive directory listing command that produces a depth indented listing of files, which is colorized ala dircolors if the LS_COLORS environment variable is set and output is to tty. You can install tree using Homebrew using the following command:
brew install tree
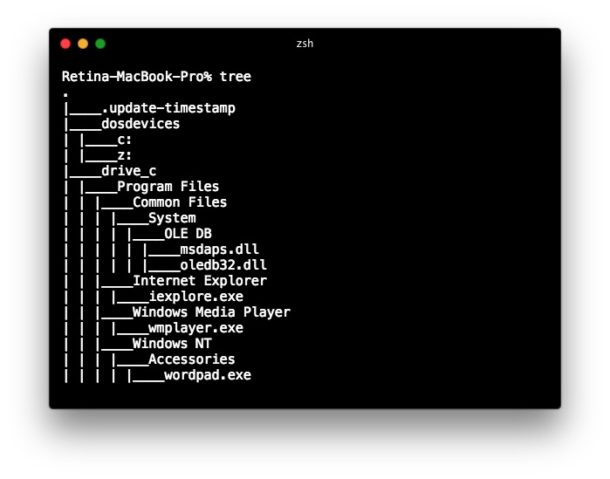
and then use tree command to see the directory structure of your current directory. For example, I have a directory named py-pg on my desktop and I want to see the directory structure of that directory, so I will run the following command:
(base) ➜  ~ cd Desktop/py-pg
(base) ➜  py-pg tree
.
├── Pandas Serial Execution.ipynb
├── Why python ?
│   ├── CODING PATTERNS TO IDENTIFY IN PROBLEMS .pdf
│   └── PYTHON INTERVIEW QUESTIONS👉.pdf
├── hello.py
├── twoSum.py
├── uc3_multithreading.py
├── uc4_multithreading.py
├── uc5_multithreading.py
└── uc6_multithreading.py

2 directories, 9 files
(base) ➜  py-pg
Auto Suggestions
Bash completion is a bash function that allows you to auto complete commands or arguments by typing partially commands or arguments, then pressing the [Tab] key. This will help you when writing the bash command in terminal. You can install suggestions using Homebrew using the following command:
brew install bash-completion
Alternatively, you can search additional packages that are available under completions by typing the following command:
brew search completions
And can install the package using brew install commands, by:
brew install <package-name>
I have installed the following packages that suit my labour of work, which are as follows:
brew install bash-completion
brew install conda-completion
brew install docker-completion
brew install docker-compose-completion
brew install pip-completion
brew install zsh-completions
Oh-My-Z(sh)ell
Zsh, short for the Z shell, is a Unix shell that enhances the default bash shell on macOS with extra functionalities. It is advisable to choose zsh instead of bash and consider installing a framework for a better experience in managing configuration, plugins, and themes. Install zsh using Homebrew using the following command:
brew install zsh
Now, we should install Oh-My-Zsh which is an open-source framework for managing zsh configuration. It comes bundled with a ton of helpful functions, helpers, plugins, and themes. The configuration file for zsh is called .zshrc and resides in your home folder as (~/.zshrc).

You can install Oh-My-Zsh using the following command:
sh -c "$(curl -fsSL https://raw.githubusercontent.com/robbyrussell/oh-my-zsh/master/tools/install.sh)"
The installation script should set zsh to your default shell, but if it doesn’t you can do it manually by:
chsh -s $(which zsh)
Oh-My-Zsh Customizations
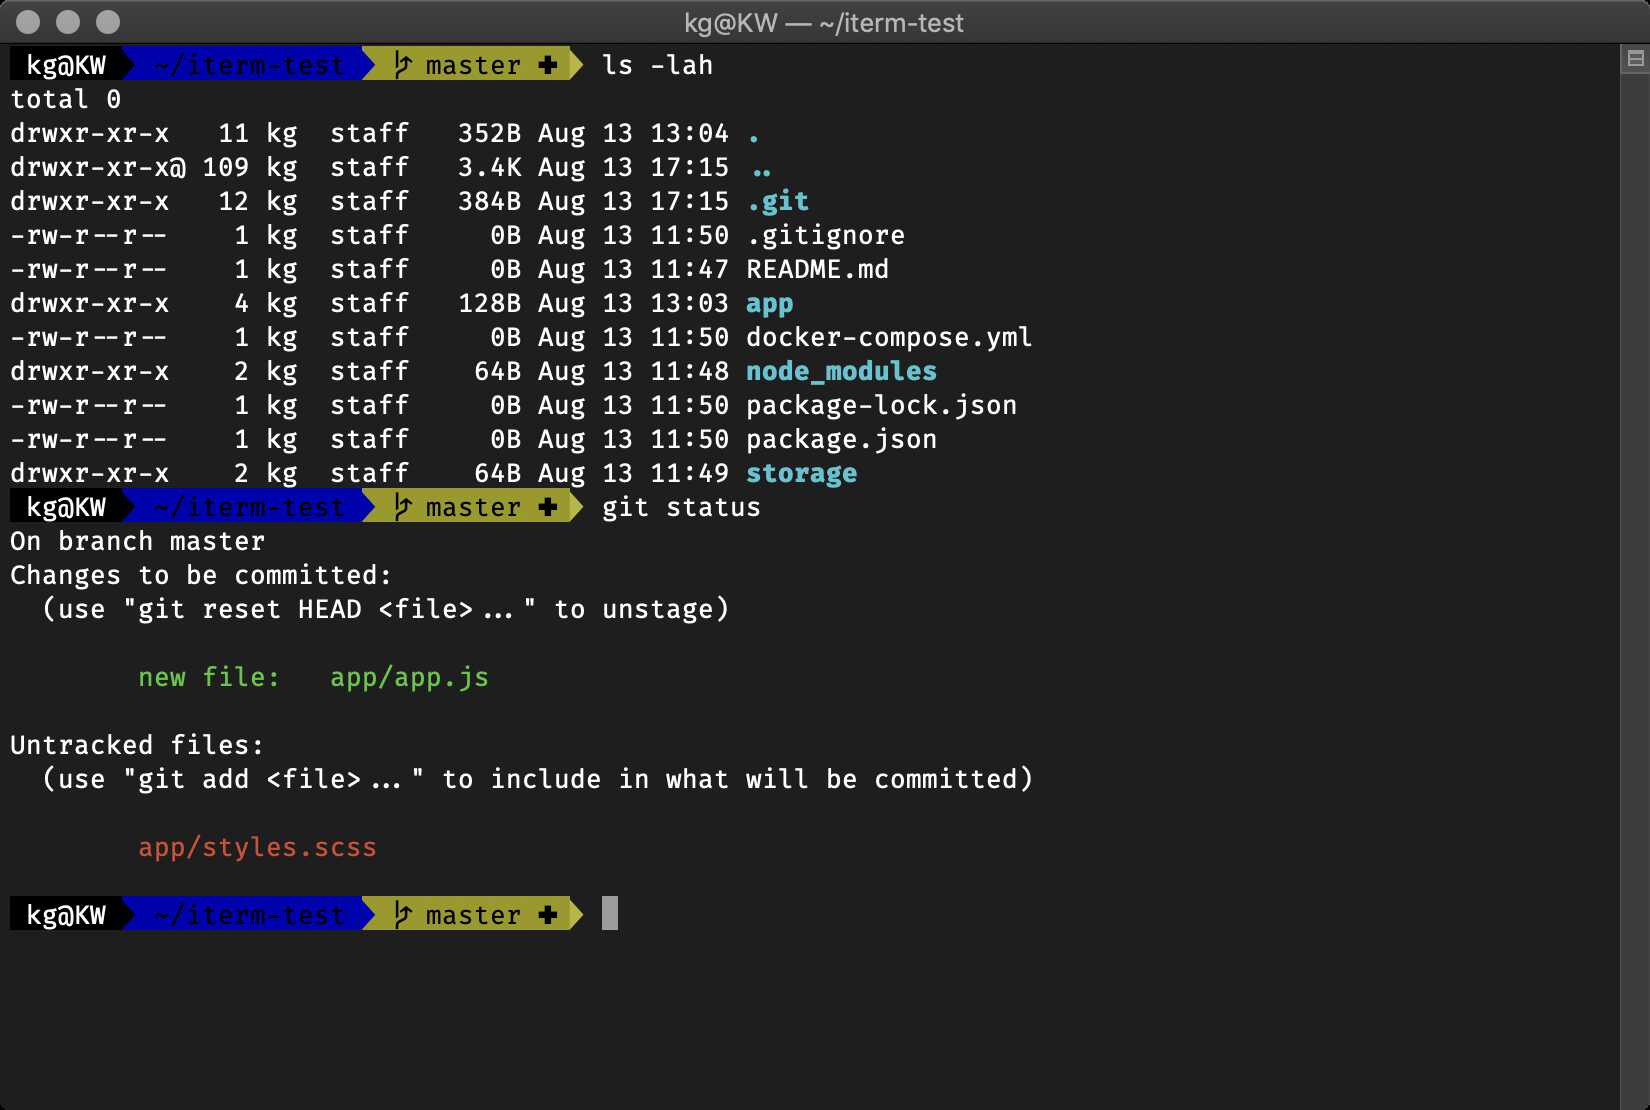
Oh-my-zsh comes with a lot of themes and plugins. You can see the list of themes here which can changed from the .zshrc configuration file. This can be done by opening the .zshrc file in your favorite editor which is done by:
vim ~/.zshrc
and changing the ZSH_THEME variable to the theme you want. I personally use agnoster theme and it can be done by changing the ZSH_THEME variable to agnoster like this:
ZSH_THEME="agnoster"
Oh-My-Zsh Plugins
To enable a plugin, you would need to edit your ~/.zshrc file and add the plugin name to the plugins array. For example, if you want to enable the git plugin, you would need to add git to the plugins array like this:
plugins=(git)
There are a lot of plugins available for Oh-My-Zsh and you can see the list of plugins here and you can install them by adding them to the plugins array. I like use the following plugins.
zsh-syntax-highlighting
The Syntax Highlighting plugin adds beautiful colors to the commands you are typing. Clone the zsh-syntax-highlighting plugin’s repo and copy it to the Oh My ZSH plugins directory by:
git clone https://github.com/zsh-users/zsh-syntax-highlighting.git ${ZSH_CUSTOM:-~/.oh-my-zsh/custom}/plugins/zsh-syntax-highlighting

zsh-autosuggestions
This plugin auto suggests any of the previous commands. Pretty handy! To select the completion, simply press → key. Clone the zsh-autosuggestions plugin’s repo and copy it to the Oh My ZSH plugins directory by:
git clone https://github.com/zsh-users/zsh-autosuggestions $ZSH_CUSTOM/plugins/zsh-autosuggestions

auto-notify
Simple zsh plugin that automatically sends out a notification when a long running task has completed. Useful for those commands you don’t predict will take long to run or just plain forgot to keep track of. Clone the auto-notify plugin’s repo and copy it to the “Oh My ZSH” plugins directory by:
git clone https://github.com/MichaelAquilina/zsh-auto-notify.git $ZSH_CUSTOM/plugins/auto-notify

Adding Plugins
There are few suggestions as well, which I personally use and you can add them to the plugins array like this:
plugins=(git colored-man-pages colorize auto-notify zsh-syntax-highlighting zsh-autosuggestions)
It is essential to understand that all of these customizations require the session to be restarted, otherwise they wont come to effect. You can do this by closing the terminal and opening it again or by running the following command:
source ~/.zshrc
The Ultimate Text Editor, Vim
Vim is a highly configurable text editor built to make creating and changing any kind of text very efficient. It is included as “vi” with most UNIX systems and with Apple OS X. Vim is rock stable and is continuously being developed to become even better.
- persistent, multi-level undo tree
- extensive plugin system
- support for hundreds of programming languages and file formats
- powerful search and replace
- integrates with many tools
To install the latest version, use homebrew by:
brew install vim
Vim Plugins
A Vim is a plugin that wraps the command-line fuzzy finder program fzf, allowing you to use it directly within Vim. It’s an interactive Unix filter for command-line that can be used with any list; files, command history, processes, hostnames, bookmarks, git commits, etc.
Maximum Awesome
Maximum Awesome is a collection of vim configuration and plugins, like a configuration manager for the vim environment. You can install them by cloning the repository and running the install script.
git clone https://github.com/square/maximum-awesome.git
and then install by running rake in the maximum-awesome directory.
cd maximum-awesome
rake
Feedback
I would love to receive feedback from anybody who reads this so that I can improve my findings and give credit where it is due followed by any corrections in the writing itself. I hope this writing helps you in some way. Thanks for reading!